
Learn 3D printer metal casting step by step with methods materials and tips to create precise metal parts using haoyumaterial.
What is 3D Printer Metal Casting?
Ever spent weeks waiting on costly aluminum tooling or struggling to carve the perfect wax pattern by hand? 3D printer metal casting eliminates those frustrating bottlenecks.
This hybrid approach bridges the gap between digital additive manufacturing and the traditional foundry. We use a 3D printer to build highly precise, sacrificial patterns or sand molds directly from a CAD file. Once printed, we take that model straight into the traditional metal casting process.
Traditional vs. Digital Pattern-Making
To understand the shift, look at how the digital workflow stacks up against legacy methods:
- The Old Way: Crafting patterns from wood, machining metal dies, or injecting wax. This demands heavy upfront costs, specialized labor, and weeks of lead time.
- The Digital Way: Harnessing lost wax casting 3D printing techniques to print patterns on demand. This slashes lead times to hours and unlocks the ability to cast complex, impossible-to-machine geometries.
The Haoyumaterial Edge
A rapid digital workflow is only as reliable as the material inside your printer. If your printed pattern leaves ash behind during the burnout cycle, your final metal cast will suffer from severe defects.
We formulated our materials at Haoyumaterial to solve this exact foundry pain point. By using our specialized, ash-free castable resins and filaments, you guarantee flawless dimensional accuracy and a perfectly clean burnout every single time. You design the part; our materials ensure it casts perfectly in metal.
Core Methods of 3D Printer Metal Casting
Investment Casting Process
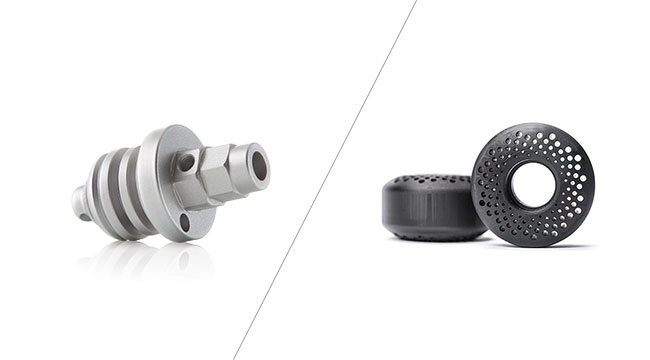
Whether you call it lost wax casting 3D printing or lost PLA metal casting, this hybrid method is an industry favorite. We print a positive model using PLA filament or castable resin. Next, we coat this model in a thick slurry to build up a durable ceramic shell investment casting. We then place the shell in a kiln to melt and cleanly burn out the printed part. This leaves a precise hollow cavity ready for molten metal. If your project demands flawless, intricate details, working with an experienced precision casting foundry ensures you get the exact tolerances you need.
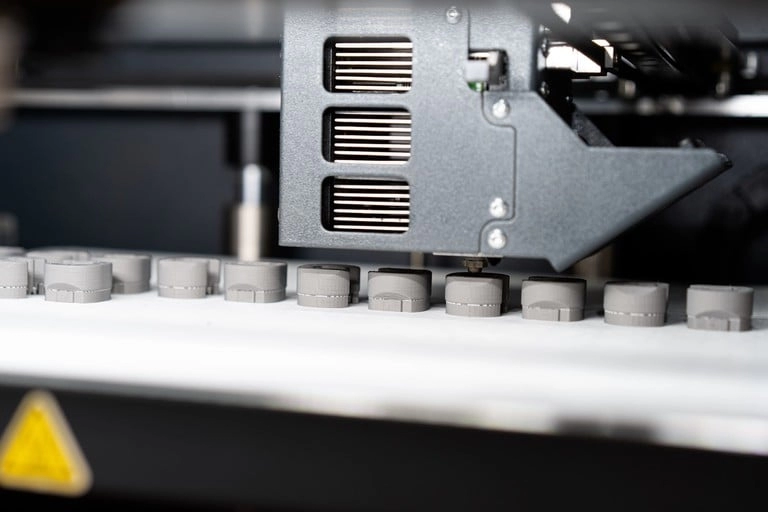
3D Printed Sand Molds
For massive, heavy-duty industrial components, we skip the plastic patterns and print the molds directly. Using binder jetting technology, we create 3D printed sand molds and internal cores straight from a digital file.
- Speed: Delivers rapid tooling in a fraction of the usual time.
- Scale: The best choice for large metal parts where investment casting isn’t practical.
- Efficiency: Completely eliminates the need for expensive physical wood or metal patterns.
Direct Metal 3D Printing vs. Hybrid Casting
It is easy to confuse printing patterns with printing actual metal parts, such as direct metal laser sintering (DMLS). Here is the bottom line:
- DMLS: Fuses actual metal powder using high-powered lasers. It is highly advanced but carries an incredibly high equipment and material cost.
- Hybrid Casting: Uses a 3D printer for the mold or pattern, then utilizes traditional pouring techniques.
Hybrid 3D printer metal casting is far more cost-effective for everyday production and low-volume runs. You secure the unmatched design freedom of 3D printing without the massive overhead of direct metal machines. This makes standard production routes, like the stainless investment casting process, highly accessible, repeatable, and budget-friendly for our localized supply chains.
Step-by-Step Workflow: From Digital File to Solid Metal
Turning a digital design into a functional part using 3D printer metal casting follows a reliable, straightforward workflow. Here is exactly how we take a concept from a screen to a finished piece of solid metal on the foundry floor.
1. 3D Design and Shrinkage Compensation
Everything starts in CAD software. Before preparing the file for the printer, we add a proper sprue and gating system design to ensure the molten metal flows rapidly and evenly into the cavity. Because all metals contract as they cool, we also scale the 3D model up—typically by 1% to 3%—to handle accurate metal casting shrinkage compensation.
2. Printing the Pattern
We select the 3D printing technology based on the specific needs of the part:
- SLA/DLP Printing: Best for capturing the ultra-fine details required for jewelry and dental work.
- FDM Printing: The go-to choice for larger, bulky mechanical components.
- Material Selection: Success heavily depends on using an ash-free 3D printing filament or specialized castable resin that vaporizes cleanly without leaving carbon deposits.
3. Mold Preparation and Investment
Next, we move into metal casting mold making. We secure the printed pattern inside a flask and pour in the molding sand or investment plaster. A critical step here is vacuum degassing investment plaster; this pulls out trapped air bubbles that would otherwise cause ugly pits and defects on the final metal surface. If you want to understand the long-term economics of this phase, our investment mold guide on tooling costs, materials, and lifespan breaks down everything you need to know.
4. The Burnout Cycle
We transfer the cured mold into a programmable kiln. By strictly following a proven castable resin burnout schedule, we slowly ramp up the heat in stages. This controlled heating cleanly melts and vaporizes the polymer pattern, leaving a perfectly hollow, highly detailed cavity inside the ceramic shell.
5. Melting and Pouring
With the mold fully burned out and still hot, we prepare the metal. We melt down the required alloy—aluminum, brass, bronze, or silver—and safely pour it into the cavity. For industrial applications requiring tight tolerances and lightweight durability, partnering with an expert aluminum investment casting company for precision components ensures the metallurgical properties are spot on.
6. Demolding and Post-Processing
Once the metal has cooled and solidified, we break apart the investment shell or sand mold to reveal the cast part. We then cut off the sprues and gates, grind down the rough attachment points, and sand the piece. A final round of polishing or sandblasting gives the metal its finished, professional appearance.
Advantages of 3D Printer Metal Casting

Merging modern 3D printing with traditional foundry techniques completely shifts how we approach metal fabrication. Here is why combining these methods gives you a massive competitive edge:
- Unmatched Design Freedom: You can easily create complex internal channels and severe undercuts. These tricky geometries are simply impossible to achieve using traditional injection-molded wax. Utilizing lost wax casting 3D printing removes old physical design limits, letting you build exactly what you engineered.
- Rapid Prototyping Metal Casting: We are cutting project lead times from weeks down to a matter of hours. This speed allows designers and engineers to test physical, solid metal parts faster than ever before. Streamlining your overall manufacturing process means you can iterate, test, and improve designs without agonizing delays.
- Cost-Effective Low-Volume Production: You completely eliminate the need for expensive upfront aluminum tooling or heavy steel dies. By adopting 3D printer metal casting techniques, any standard workshop can function as a highly efficient additive manufacturing foundry. This keeps short, custom production runs highly profitable and lean.
Choosing the Right Materials for 3D Printer Metal Casting
To get the best results in your shop or foundry, you need to match your material to your project. Here is how I break down the material choices for successful 3D printer metal casting:
- Castable Resins: This is your go-to for high-detail work. If you are doing 3D printer jewelry casting or intricate dental parts, you need a resin with excellent clean-burn properties. Following a precise castable resin burnout schedule is crucial here so you do not end up with ash ruining your mold cavity.
- PLA and Specialized Filaments: When you need to scale up for larger investment casting, lost PLA metal casting is the way to go. Using an ash-free 3D printing filament makes it easy to create large, complex parts while ensuring the mold is completely clean before you pour your molten metal.
- Partnering with Haoyumaterial: Your final cast is only as good as the materials you start with. We provide the specific material solutions, casting aids, and equipment you need for reliable, repeatable results every time you fire up the kiln. Whether you are running a small desktop foundry or looking into a larger industrial die casting process, utilizing premium supplies from Haoyumaterial guarantees a smoother workflow from the initial print to the final solid metal part.
Metal Casting Mold Making Challenges
Even with a solid 3D printer metal casting setup, issues can pop up in the shop. Here is how we troubleshoot the most common problems to keep production moving.
Ash Residue During Burnout
Leaving ash residue inside the mold cavity ruins a good cast. To prevent casting defects, you need a dialed-in castable resin burnout schedule. Whether you use specialty castable resins or an ash-free 3D printing filament, make sure your kiln hits the exact peak temperature required. Stepping up the heat gradually prevents mold cracking, while holding the top temperature long enough ensures the printed pattern vaporizes completely.
Porosity and Air Bubbles
Air bubbles trapped against your printed pattern will turn into ugly metal nodules on your final piece. The standard fix for this is vacuum degassing investment plaster.
- Mix and vacuum: Mix your investment plaster and immediately place it in a vacuum chamber to pull out the trapped air.
- Pour and vacuum again: Pour the degassed mixture over your 3D printed pattern and run the vacuum one more time. This guarantees a tight, bubble-free seal around the mold.
Surface Finish and Layer Lines
Molten metal copies everything—including the layer lines from your 3D printer. If we are pouring a highly detailed copper alloy part, any rough texture on the printed pattern transfers directly to the final metal cast.
- Drop the layer height: Print at the lowest layer height possible to minimize stepping right out of the printer.
- Sand the pattern: Use fine-grit sandpaper to knock down any visible layer lines before the molding stage.
- Apply a smoothing agent: Brush on a specialized smoothing resin or casting wax to fill in the micro-steps on FDM or SLA prints before investment.